
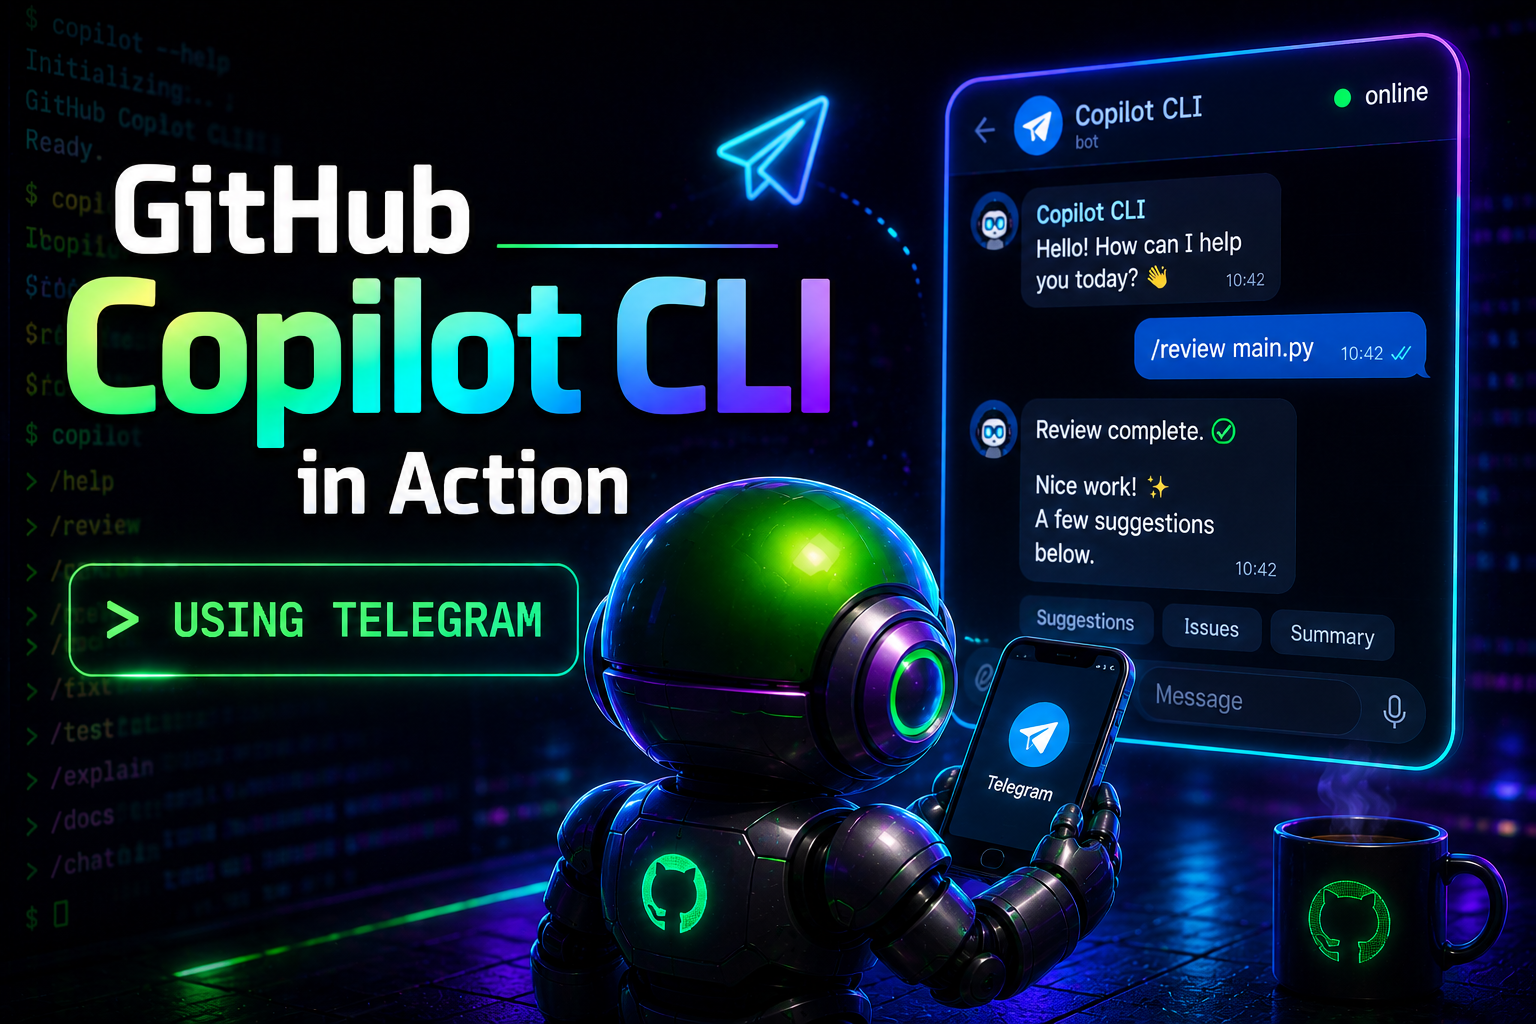
 I spend a lot of time working with GitHub Copilot CLI. It’s great when I’m sitting in front of a terminal, but sometimes I’m away from the machine and want to kick off a review, ask a follow-up question, or check on the status of an agent task.
I recently went on a family vacation to Spain and wanted to explore an app feature during downtime between sightseeing stops, without pulling out my iPad. While Copilot CLI’s remote feature works well, I prefer to use Telegram. I already use it with my OpenClaw and Hermes agents and like the general flow.
That sent me down a small rabbit hole: could I use Telegram as a chat front end for Copilot CLI?
I didn’t want a remote terminal in Telegram. I already have SSH for that, and I could also use Copilot CLI’s remote feature. What I wanted was closer to a normal chat experience: send a message, have Copilot CLI do work in a project, and get a response back. Simple idea, slightly less simple setup.
In this post, I’ll walk through how I enabled a Telegram bot for GitHub Copilot CLI using the examon/copilot-cli-telegram-bridge extension. I’ll also cover what I checked before installing it, the setup steps, and a few gotchas I hit along the way.
What I Was Trying to Accomplish
The goal was straightforward:
- Use Telegram to send prompts to a running Copilot CLI session
- Keep the Copilot session attached to a real project folder
- Avoid exposing API keys or bot tokens
- Avoid a raw terminal or tmux-style experience in Telegram
- Keep the setup locked down to my Telegram user
That last point matters. A Telegram bot wired into an AI coding agent isn’t just a chat toy. Depending on how you start Copilot CLI, it can read files, run commands, edit code, and interact with your machine. Treat it like remote developer access, because that’s basically what it is.
Also remember that Telegram bot messages go through Telegram’s Bot API. Don’t send prompts or outputs that contain secrets, customer data, or sensitive proprietary code unless that fits your risk model.
The First Thing I Rejected: Remote Terminal Bots
Before landing on the Copilot CLI Telegram Bridge extension, I looked at remote terminal-style projects. One of them worked with Telegram, but the experience wasn’t what I wanted at all.
The problem was architectural. Some tools wrap a terminal session and stream ANSI/TUI output back to Telegram. That sounds useful until you see terminal escape sequences, broken formatting, and partial screen redraws show up in chat:
[?2026h
[?2004h
That’s terminal state leaking into a chat interface. I explored stripping some escape sequences but quickly realized I was going down the wrong path.
The better approach was to use something that integrates with Copilot CLI as an extension instead of pretending Telegram is a terminal emulator.
The Extension I Used
The extension I ended up using was this one by Tomas Meszaros:
https://github.com/examon/copilot-cli-telegram-bridgeThe plugin description is exactly what I was looking for:
A GitHub Copilot CLI extension that bridges Telegram messages bidirectionally with a CLI session. Send messages from Telegram, get agent responses back.
The important implementation detail: it uses joinSession from @github/copilot-sdk/extension.
That’s a much better fit than a PTY-based wrapper. It joins the active Copilot CLI session and relays messages, instead of trying to screen-scrape a terminal.
Here’s how I got started using it.
Step 1: Review the Extension Before Running It
Even though the creator works at GitHub, I don’t recommend installing random agent extensions, plugins, skills, or MCP servers and hoping for the best. That’s how you accidentally give a weekend project access to your repo, shell, and secrets. Fun for about four seconds. I still went through a due diligence process just to double-check things.
I cloned the repo into a temporary review folder first:
git clone https://github.com/examon/copilot-cli-telegram-bridge.git /tmp/copilot-cli-telegram-bridge-review
cd /tmp/copilot-cli-telegram-bridge-review
git rev-parse HEAD
Then I inspected the key files:
sed -n '1,220p' README.md
sed -n '1,120p' plugin.json
sed -n '1,220p' extension.mjs
sed -n '1,180p' skills/telegram-install/SKILL.md
A few things I specifically checked:
# Syntax check
node --check extension.mjs

# Look for process execution or risky dynamic code patterns
grep -Ei 'child_process|spawn\(|exec\(|node-pty|eval\(|new Function' extension.mjs
What I found at the commit I reviewed:
- I didn’t see direct process execution through
child_process,spawn,exec, ornode-pty - I didn’t see obvious dynamic-code patterns like
evalornew Function - There were no third-party package dependencies in that version
- Telegram API calls were made with
fetch - The extension stores bot tokens locally in
bots.json - Authorization depends on the extension correctly enforcing the local
access.jsonallowlist
This was a basic source review, not a formal security audit. Re-check the exact commit you install. You can also ask Copilot CLI to review the extension, but I’d still do the basic manual checks yourself first.
The biggest security note is token storage. The README is clear about it: bot tokens are stored in plain text in bots.json. The extension writes that file with mode 600, and you should never commit it, copy it into backups, paste it into logs, or send it to an AI assistant. I also keep the extension directory out of dotfile backups, cloud sync folders, search indexing, and support bundles.
Step 2: Enable Copilot CLI Extensions
Copilot CLI extensions are currently experimental, so I enabled the experimental configuration. Super easy.
/experimental onStep 3: Install the Plugin
From there I installed the plugin from inside Copilot CLI:
/plugin install examon/copilot-cli-telegram-bridgeThen I verified it showed up:
copilot plugin listThe installed plugin list included:
copilot-cli-telegram-bridge (v1.0.0)The extension README then has you restart Copilot CLI and run the following skill:
/copilot-cli-telegram-bridge:telegram-installThen restart Copilot CLI again. The extension loads on startup.
Step 4: Create a Telegram Bot
Next I created a Telegram bot with @BotFather:
- Open Telegram
- Start a chat with
@BotFather - Send
/newbot - Pick a display name
- Pick a username that ends with
bot - Copy the bot token
Don’t paste the real token into code, docs, GitHub issues, screenshots, or chat transcripts. If the token leaks, revoke it with BotFather and generate a new one.
I stored the token in TELEGRAM_BOT_TOKEN only for my manual verification step. The bridge itself does not read TELEGRAM_BOT_TOKEN or a .env file; after /telegram setup <name>, it stores the token in bots.json.
I verified the bot with Telegram’s getMe API:
curl -s "https://api.telegram.org/bot$TELEGRAM_BOT_TOKEN/getMe"Avoid putting a literal bot token in the command. Even with an environment variable, remember that token-bearing URLs can end up in shell history, process listings, terminal scrollback, proxies, or logs depending on your environment.
A successful response looks like this:
{
  "ok": true,
  "result": {
    "id": 1234567890,
    "is_bot": true,
    "first_name": "Your Bot Name",
    "username": "YourBot_bot"
  }
}
Step 5: Register the Telegram Bot with the Extension
The extension supports a CLI flow:
/telegram setup mybot
/telegram connect mybot
During setup, /telegram setup <name> logs instructions and waits for the next token-shaped Copilot prompt. When I pasted the BotFather token into Copilot CLI, the extension intercepted it, validated it with Telegram getMe, stored it in bots.json, and replaced the raw token prompt before it reached the agent.
After connecting, I sent a message to the bot in Telegram. The extension printed a pairing code in Copilot CLI, and I sent that code back to the bot. Once paired, my Telegram user ID was written to access.json. Treat the pairing code like a short-lived secret while setup is in progress. After pairing, access.json is only one layer of control: if someone gets the bot token, your Telegram account, local filesystem access, or can modify access.json, they may be able to reach the bridge.
That pairing step matters because the bot should not accept messages from random Telegram users. A Telegram bot connected to a coding agent is not a toy unless you enjoy letting strangers remodel your filesystem.
In my case I registered the bot locally as:
copilotcliBy default, the extension stores its files under:
${COPILOT_HOME:-$HOME/.copilot}/extensions/copilot-cli-telegram-bridge/If COPILOT_HOME is not set, that resolves to:
~/.copilot/extensions/copilot-cli-telegram-bridge/The important files are:
bots.json
access.json
bots/copilotcli/state.json
bots/copilotcli/lock.json
bots.json contains the bot token. The extension writes it as 0600, but I still verify it manually. access.json does not contain the bot token, but it does contain allowed Telegram user IDs and may temporarily contain pending pairing codes, so I restrict it too:
chmod 700 ~/.copilot/extensions/copilot-cli-telegram-bridge
chmod 600 ~/.copilot/extensions/copilot-cli-telegram-bridge/bots.json
chmod 600 ~/.copilot/extensions/copilot-cli-telegram-bridge/access.json
My sanitized bots.json looked like this:
{
  "copilotcli": {
    "token": "[REDACTED]",
    "username": "YourCopilotBridge_bot",
    "addedAt": "2026-05-11T01:33:48Z"
  }
}
The extension used access.json as its local allowlist for Telegram user IDs:
{
  "allowedUsers": [
    "[YOUR_TELEGRAM_USER_ID]"
  ],
  "pending": {}
}
In my real config, this was my Telegram user ID. If you set this up yourself, use your own Telegram user ID. Don’t manually add broad, shared, or group IDs unless you have tested the behavior and accept the risk. A Telegram group or shared bot changes the threat model.
One important detail: access.json is shared across all bots managed by this extension. Pairing with one registered bot grants that Telegram user access to every bot registered in the same extension directory.
Step 6: Clear Webhooks Before Using Long Polling
The bridge uses Telegram getUpdates long polling and does not call deleteWebhook itself. Telegram only allows one active poller per bot token, and a webhook can also conflict with polling.
If your bot previously had a webhook, clear it manually before connecting:
curl -s "https://api.telegram.org/bot$TELEGRAM_BOT_TOKEN/deleteWebhook"This matters more than it sounds. If another process is polling the same bot, Telegram returns conflicts or one session takes over from another. A Telegram 409 can mean another getUpdates consumer is active or a webhook is still configured. I hit that during setup.
The symptom looked like this in Copilot CLI:
Telegram bridge released (another session took over). Type /telegram connect copilotcli to reclaim.In my case, the culprit was a verification call that used getUpdates while the bridge was already polling. That was a self-inflicted wound. After that, I avoided direct getUpdates calls while the bridge was running.
Step 7: Start Copilot CLI for the Project
The bridge attaches to a running Copilot CLI session, so start Copilot from the project folder you want it to work in.
For example:
cd ~/projects/[my-project]

copilot \
  --experimental \
  --model gpt-5.5 \
  --no-remote \
  --disallow-temp-dir \
  --secret-env-vars=TELEGRAM_BOT_TOKEN,GITHUB_TOKEN,GH_TOKEN,OPENAI_API_KEY,ANTHROPIC_API_KEY \
  --log-level warning
A few notes on those flags:
--experimentalenables experimental features, including extension/plugin support required by this bridge--model gpt-5.5starts with the model I wanted--no-remotekeeps the session local instead of allowing GitHub web/mobile remote control--disallow-temp-dirprevents automatic file-access permission for the system temporary directory--secret-env-vars=...strips those environment variables from shell/MCP server environments and redacts their values from output
I am intentionally not disabling Copilot CLI’s built-in GitHub MCP server in this command. For a GitHub-focused workflow, that MCP can be useful for repo, issue, PR, and GitHub context. If you want fewer integrations, you can add --disable-builtin-mcps, but for this workflow I’d leave it on.
TELEGRAM_BOT_TOKEN only needs to be listed there if you exported it for your own shell commands. The bridge reads the token from bots.json, not from the environment.
Once Copilot CLI is running, connect the Telegram bridge:
/telegram connect copilotcliCopilot prints something like:
Telegram bridge connected (@YourCopilotBridge_bot).At that point, messages sent to the Telegram bot flow into the Copilot CLI session, and Copilot’s responses are sent back to Telegram.
Step 8: Decide How Much Permission to Give It
This is the part to think about carefully.
The first bridge worked, but one review got stuck for a while because Copilot was waiting on a tool approval prompt that did not surface cleanly through my Telegram flow. The session looked like it was still typing… forever.
The task was harmless. Copilot wanted approval for a basic command like wc -l. Current versions of the bridge include an input handler for SDK-level user questions and choices, so this behavior can vary by bridge and Copilot CLI version. If a task appears to type forever, check the terminal before assuming the agent is still working.
There are two ways to reduce that friction.
Less Risky Option: Avoid --yolo, but Still Treat It as Powerful
You can start Copilot with a more permissive but still constrained setup:
copilot \
  --experimental \
  --allow-all-tools \
  --add-dir ~/projects/my-project \
  --allow-url github.com \
  --allow-url api.github.com \
  --deny-tool='shell(git push)' \
  --deny-tool='shell(git commit)' \
  --deny-tool='shell(git reset)' \
  --deny-tool='shell(rm)' \
  --deny-tool='shell(shred)' \
  --deny-tool='shell(sudo)' \
  --model gpt-5.5 \
  --no-remote \
  --disallow-temp-dir \
  --secret-env-vars=TELEGRAM_BOT_TOKEN,GITHUB_TOKEN,GH_TOKEN \
  --log-level warning
This is less risky than --yolo, but it is not a sandbox. --allow-all-tools auto-approves all tools except the exact deny patterns you list, while path and URL permissions are still controlled separately.
Permission syntax can change, so verify the exact allow/deny patterns for your Copilot CLI version with:
copilot help permissionsIt can reduce approval hangs for routine commands while blocking some obvious high-risk commands. Don’t treat the deny list as complete or bypass-proof; shell permissions are hard to constrain with string patterns. Equivalent destructive actions may still be possible through other commands, scripts, or tools. Prefer running this in an isolated VM/container, on a clean working tree, with limited credentials.
Full Convenience Option: --yolo
I eventually restarted the test session with --yolo because I wanted to see how well the Telegram workflow behaved without approval prompts.
Copilot CLI describes --yolo this way:
--yolo
Enable all permissions, equivalent to:
--allow-all-tools --allow-all-paths --allow-all-urls
Copilot CLI also has --allow-all, which enables the same permission shape. --yolo is the memorable alias, because apparently even CLIs need a chaotic little nickname.
I would not recommend this as the default setup. --yolo removes the approval boundary and allows all tools, paths, and URLs. Only use it in an isolated environment with limited credentials and a dedicated bot/token.
The launch command looked like this:
cd ~/projects/my-project

copilot \
  --experimental \
  --yolo \
  --model gpt-5.5 \
  --no-remote \
  --disallow-temp-dir \
  --secret-env-vars=TELEGRAM_BOT_TOKEN,GITHUB_TOKEN,GH_TOKEN \
  --log-level warning
Then I connected the bot again:
/telegram connect copilotcliThis solved the approval hang problem. It also means the Telegram bot is now extremely powerful. If you use --yolo, treat the bot like developer access to that machine.
I wouldn’t run that mode on a shared bot, group chat, personal laptop, production server, or any machine with broad filesystem secrets. Telegram connects to Copilot CLI running on an isolated VM I run in the cloud so collateral damage is minimized in my case.
Step 9: Verify the Bridge is Running
After connecting, I checked the process and lock file.
The lock file lives here:
~/.copilot/extensions/copilot-cli-telegram-bridge/bots/copilotcli/lock.jsonA sanitized version looked like this:
{
  "pid": 12345,
  "sessionId": "[REDACTED-SESSION-ID]",
  "connectedAt": "2026-05-11T10:14:49.369Z"
}
The lock file tells you which extension process and Copilot session ID currently hold the bot. It does not record the project directory or permission flags. I separately checked the main Copilot process to confirm the flags I had launched with:
ps -p 2359053 -o pid=,ppid=,stat=,etime=,cmd=The command included:
copilot --banner --experimental --yolo --model gpt-5.5 ...That gave me evidence that the bridge was connected to the Copilot session I had launched, in the project and permission mode I expected.
Gotcha 1: Slash Commands Are Awkward Through Telegram
Copilot CLI slash commands like /model are CLI UI commands. With this bridge, normal Telegram text is forwarded to the session as prompt text, not dispatched through Copilot CLI’s slash-command router.
So if you type this in Telegram:
/modelit should not be treated as the same thing as typing /model directly into Copilot CLI.
For normal work, this is fine. Ask natural-language questions and give tasks in plain English. For CLI-level commands like changing models, connecting/disconnecting the bridge, checking /telegram status, or clearing a session, run those in the Copilot CLI session itself.
Gotcha 2: Approval Prompts Can Look Like Infinite Typing
The most annoying issue was the stuck review.
From Telegram, it looked like Copilot was typing forever. In my test, the CLI session was waiting for a tool approval prompt that did not surface cleanly through my Telegram flow. The current bridge includes an input handler for SDK-level user questions and choices, so this behavior can vary by bridge and Copilot CLI version. If a task appears to type forever, check the Copilot CLI session before assuming the agent is still working.
The options are:
- Use safer allow/deny flags so routine commands don’t require approval
- Use
--yoloonly in an isolated environment where the bot, Telegram account, host, repo, and credentials are all treated as high-trust/high-risk - Avoid long-running review tasks from Telegram unless you can check the terminal if needed
For my personal test bot, I chose --yolo. For a team bot, I wouldn’t.
My Current Launch Command
For my personal test session, I used the --yolo version from Step 8, then connected the bot from inside Copilot CLI:
/telegram connect copilotcliFor most people, I’d start with the safer allow/deny version first. Move to --yolo only if you understand that you are effectively granting remote developer-level access to that environment.
Final Thoughts
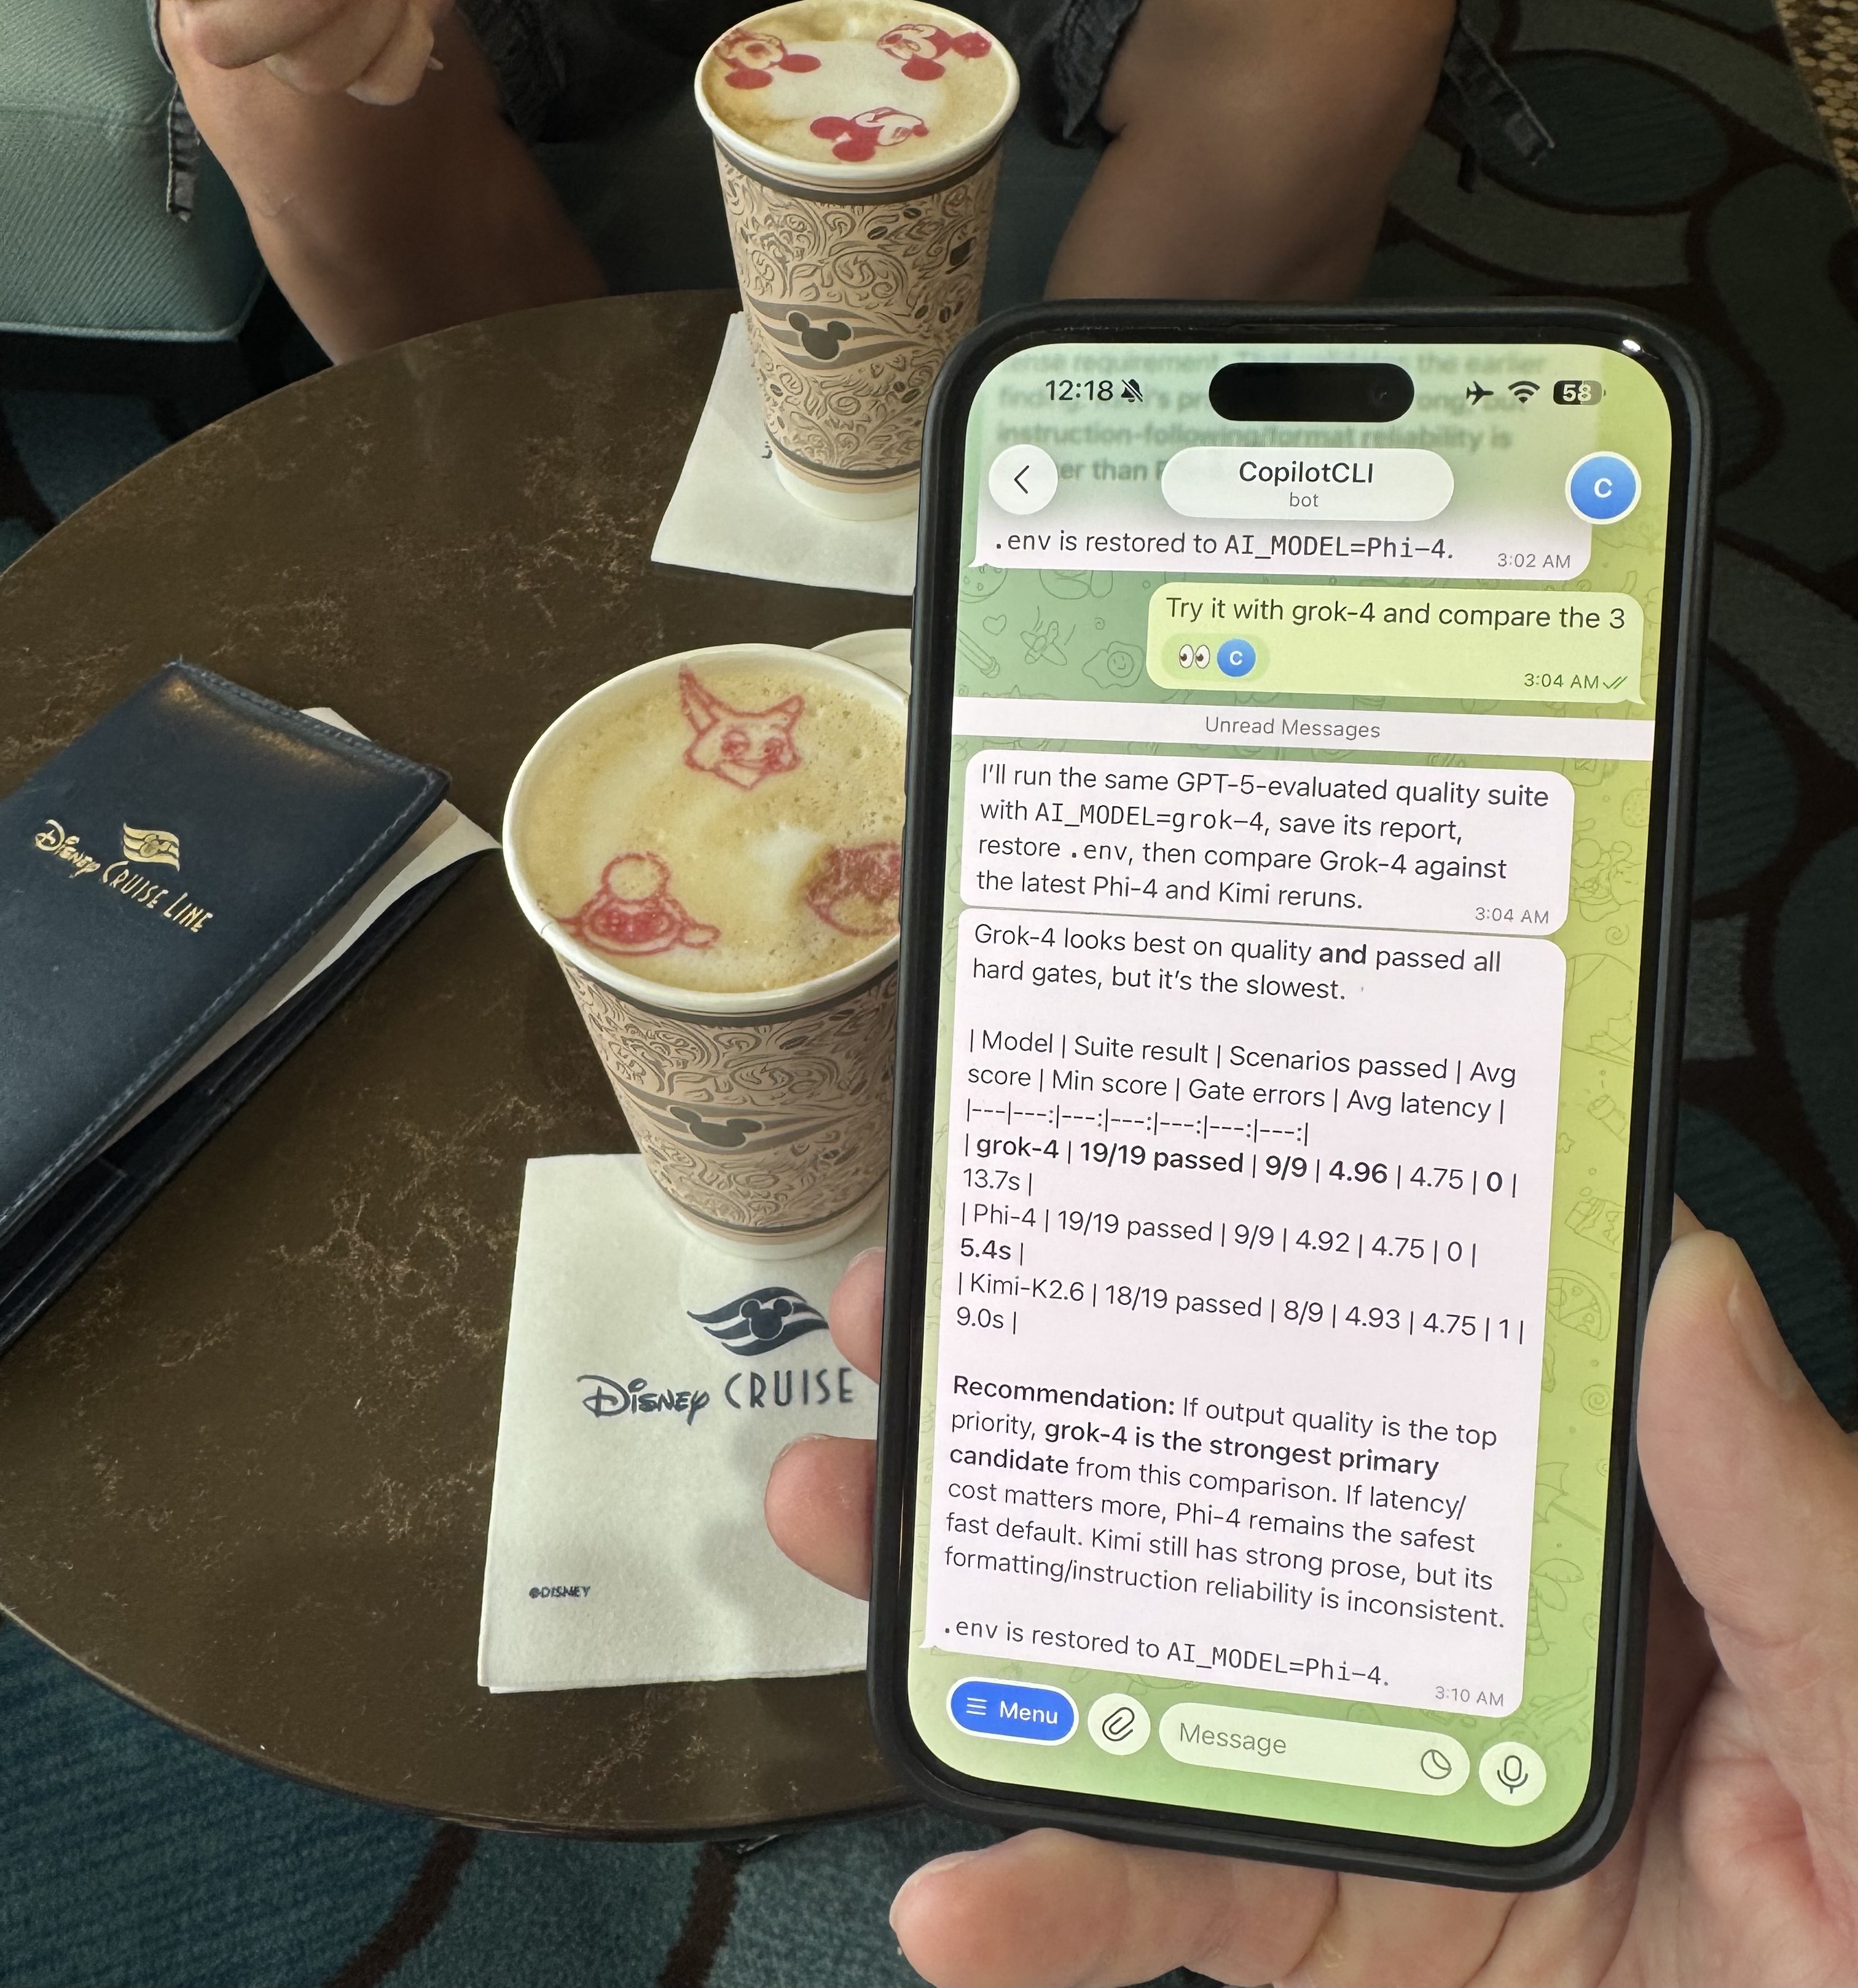
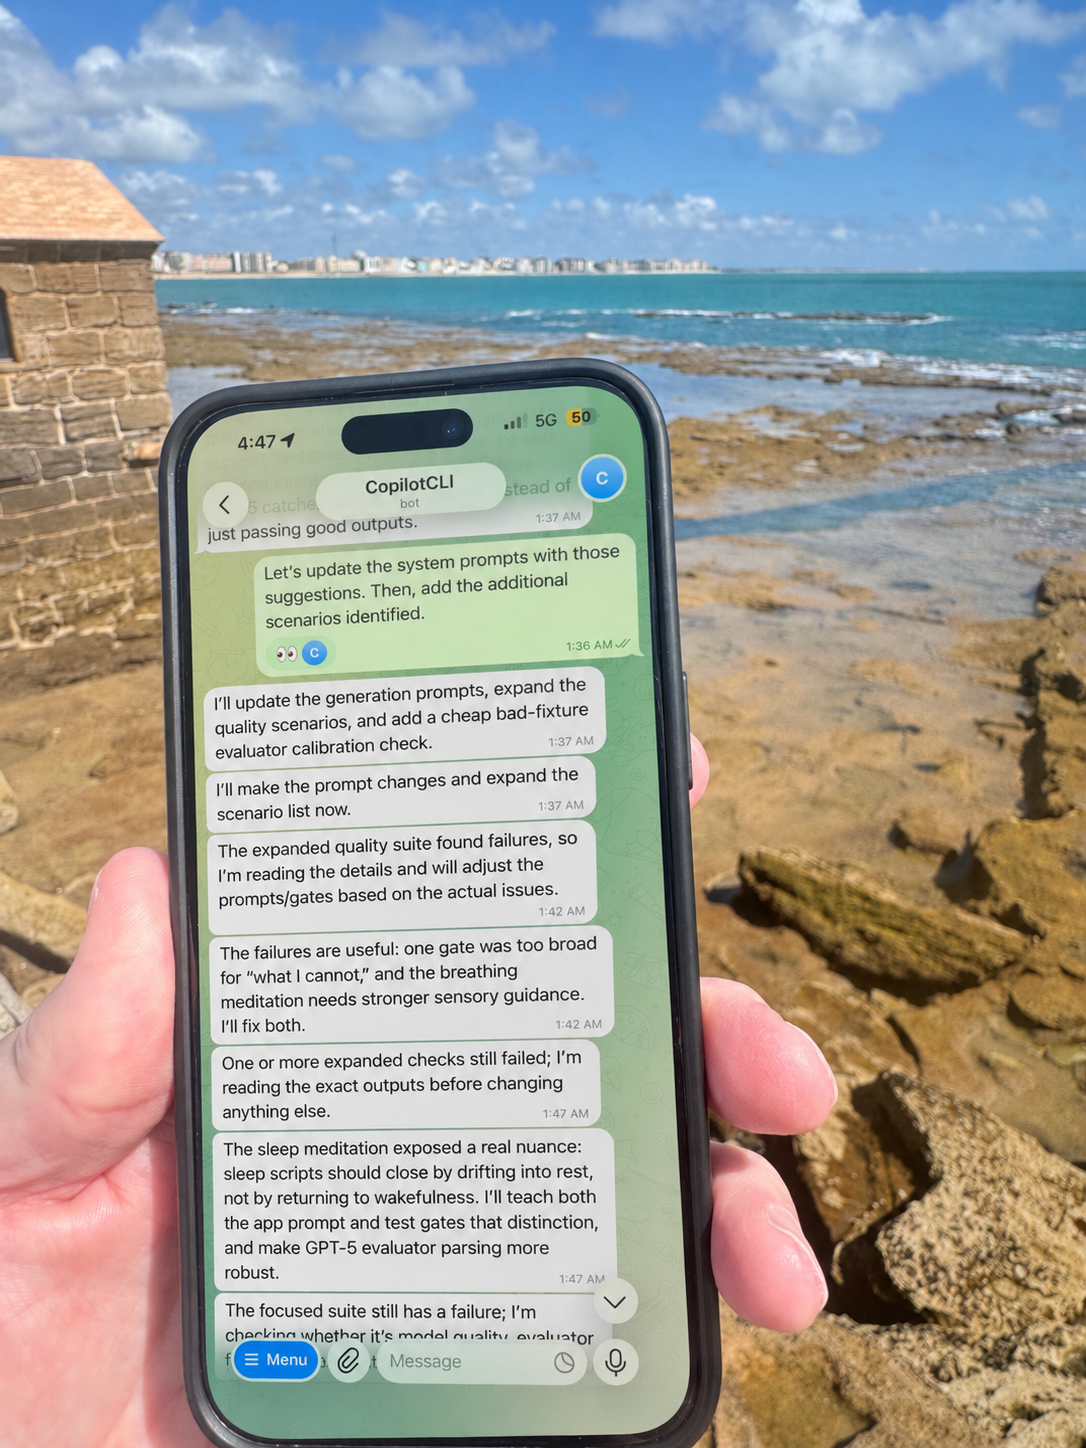
I used the Copilot CLI Telegram Bridge extensively over vacation in Europe. Telegram became my lightweight chat front end for a real Copilot CLI session. Since I could use it directly from my phone while waiting for the family to get ready or during other downtime, my wife didn’t complain that I was “working while on vacation.” Yes, I probably need to completely disconnect, but that’s never been my style. 😀
The important lesson for me was that architecture matters. A PTY streamed into Telegram feels like a terminal wearing a fake mustache. It technically works, but it’s not the experience I wanted. An extension that joins the Copilot session is a much better direction.
Would I run this for a team today? No, not without more guardrails.
Would I use it personally to check in on a project, ask Copilot a question, or kick off a focused task while away from my desk? Yes. I used it to do research, compare some LLMs, and add several new features to an app.
If you try this yourself, start with a dedicated Telegram bot. Lock the token file down, allow only your Telegram user ID, avoid multiple pollers, and be intentional about permission flags. With those caveats, I’ve found the extension works really well for a personal, isolated setup. Shoutout to Tomas Meszaros for creating it!